
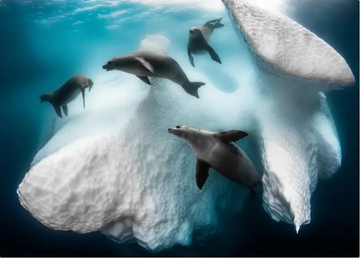
Wide-angle and fisheye lenses capture the vastness of the ocean, but without the power of light, this vast canvas loses all color and depth. Unlike macro photography, which relies on pinpoint accuracy, wide-angle lighting is an art of range and control. Your goal isn't to illuminate a single point, but to evenly and vividly render a vast three-dimensional space while avoiding illuminating objects suspended between the lens and the water (backscatter). Successful wide-angle lighting can elevate your image from a "blue picture" to a "compelling story."

Core equipment configuration: dual-light system is the starting point
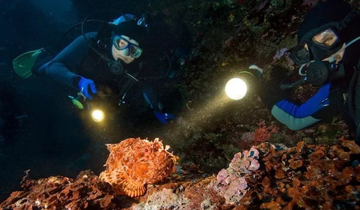
For most serious wide-angle photography, a single light is almost always insufficient. We strongly recommend a two-light system—either dual flashes or dual high-powered video lights. Positioning is key to success. Using an adjustable, floated arm, position the light head slightly in front of and slightly outward from the camera port, flaring it outward at an angle of approximately 30-45 degrees. This angle ensures that the brightest center beam illuminates the edges of the frame, while the two beams create a wide, even overlap directly in front of the lens, perfectly covering your field of view and eliminating harsh central hotspots and vignetting at the edges. Arm length is crucial; you'll typically need at least 15-20 cm of reach to effectively push the light away from the lens axis and minimize backscatter.

Technical details: precise coordination of angle, power and beam
Simply turning on the light is not enough, you need to fine-tune every parameter:
Beam Angle: Choose Flood mode or use a wide-angle diffuser. You want the widest possible beam (over 100 degrees) to cover a wide field of view, not a concentrated beam of light.
Light Head Angle: This is a dynamic adjustment. When photographing a large scene, the light head can be angled further outward to cover a wider area. When you're close to a subject (such as coral formations or a section of a wreck), you'll need to slightly inward to ensure the light hits the precise part you want to highlight.
Power Setting: Manual mode is your friend. Set the power based on the distance to your subject. The rule of thumb is: double the distance, and the light intensity decreases by a quarter. Don't blindly use the highest power, as this will illuminate any floating objects in the foreground, resulting in a "snowflake" effect. Usually, start with a medium power setting for test shots and adjust gradually.
Color Temperature (Kelvin): If you’re using a video light, setting the color temperature between 4500K and 5500K (mid-white to cool white) can effectively compensate for the red and yellow light absorbed by the water, better reproducing the true colors of corals and fish.

Creative applications: from lighting to dreaming
Once you master the basic techniques, you can tell stories with light:
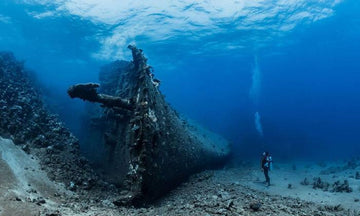
Separate the subject from the background: Focus your light on the coral or model in the foreground, while underexposing the background (the blue water or the silhouette of a wreck) to natural light. This contrast creates a strong sense of drama and three-dimensionality.
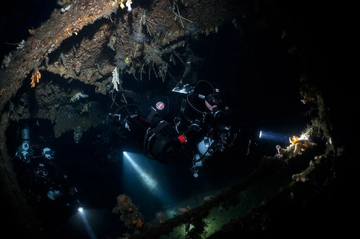
Create mood lighting: During dusk or night dives, try using just one light to lightly illuminate the reef or sand from below, creating a mysterious underlit effect. A second light can be used to lightly fill in the subject to add depth.
Control light and shadow: Side lighting can dramatically enhance texture—the rusted metal of a wreck, the grooves of coral, and the ripples in the sand all become richly textured when lit from the side. Be cautious with front lighting (light shining directly on the subject). While it best reproduces color, it also tends to make the image appear flat.

Lighting a wide-angle dive requires repeated practice and experimentation. Every dive is different; water quality, visibility, and ambient light all fluctuate. The best advice is to shoot frequently, adjust frequently, and review frequently. Carefully monitor your histogram to ensure you haven't blown out details. Review your shots to check for annoying backscatter and adjust your lighting accordingly. Once you master the art of controlling light, you'll truly possess the brush to paint on the vast canvas of the deep sea.
9y7swc
9y7swc
Visa
lzwyqetjz http://www.gyx1ip7uz049e0092048ef46ot2wd0pms.org/
alzwyqetjz
[url=http://www.gyx1ip7uz049e0092048ef46ot2wd0pms.org/]ulzwyqetjz[/url]
n93yw5
a6yrro